Building on DID Spaces

Introduction#
In this article, you will learn how to use the Todo List application that has integrated DID Spaces, and store your data in DID Spaces.
Prerequisites#
- Skills required: developers with a certain foundation in developing React + Express + Typescript applications.
- Operating System: It is recommended to use MacOS, and Linux for development, while Windows needs
- Environment: Node.js >= 20
Getting Started#
Preparation#
- Install DID Wallet: please refer to
- Install Node.js: please refer to
- Install Blocklet CLI: Please refer to
- Complete email verification and blocklet store setup
- Get email verification certificate: https://test.store.blocklet.dev/.well-known/service/kyc/email
- Get TBA token for future use: https://faucet.abtnetwork.io/
- Get your developer passport on blocklet store: https://test.store.blocklet.dev/join
- Connect blocklet store and your development environment:
blocklet connecthttps://test.store.blocklet.dev/
- Get email verification certificate: https://test.store.blocklet.dev/.well-known/service/kyc/email
Create an application(video version)#
Create an application(text version)#
- Create a Todo List application
Now we can use the capabilities of Blocklet CLI to create a minimalist Todo List application integrated with DID Spaces in just a few minutes, which you can use as a basis for further development.
Enter blocklet create in the terminal, enter the project name, select the [dapp: todo-list] react + express + typescript + DID Spaces template, fill in the author and email, then press Enter:
╰─➤ blocklet create
blocklet create v1.16.32-beta-20240924-105841-08174626
Need to install the following packages:
create-blocklet@0.9.5
Ok to proceed? (y) y
Powered By
_ ____ _ _
/ \ _ __ ___| __ )| | ___ ___| | __
/ _ \ | '__/ __| _ \| |/ _ \ / __| |/ /
/ ___ \| | | (__| |_) | | (_) | (__| <
/_/ \_\_| \___|____/|_|\___/ \___|_|\_\
Create Blocklet v0.9.5
✔ Project name: … todo-list //
? Choose one or more blocklet templates: ›
Instructions:
↑/↓: Highlight option
←/→/[space]: Toggle selection
[a,b,c]/delete: Filter choices
enter/return: Complete answer
Filtered results for: Enter something to filter
◯ [dapp] react + express.js
◯ [dapp] react + express + typescript
◉ [dapp: todo-list] react + express + typescript + DID Spaces // 选择 DID Spaces 模板
◯ [dapp] solid + express.js
◯ [dapp] vue3 + express.js
◯ [dapp] svelte + express.js
◯ [static] react
◯ [static] solidjs
◯ [static] vue3
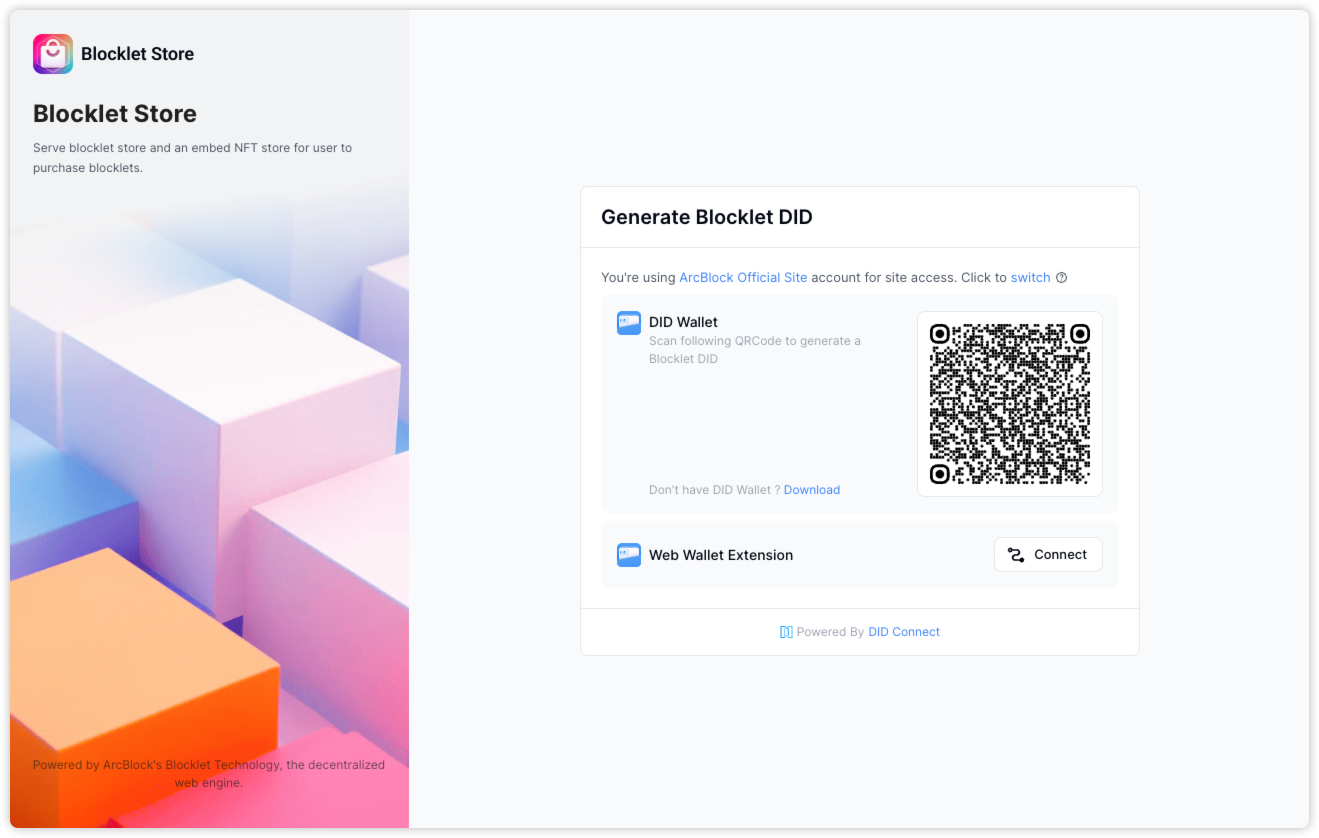
◯ [static] vue3 + typescriptConnect using DID Wallet to generate app DID
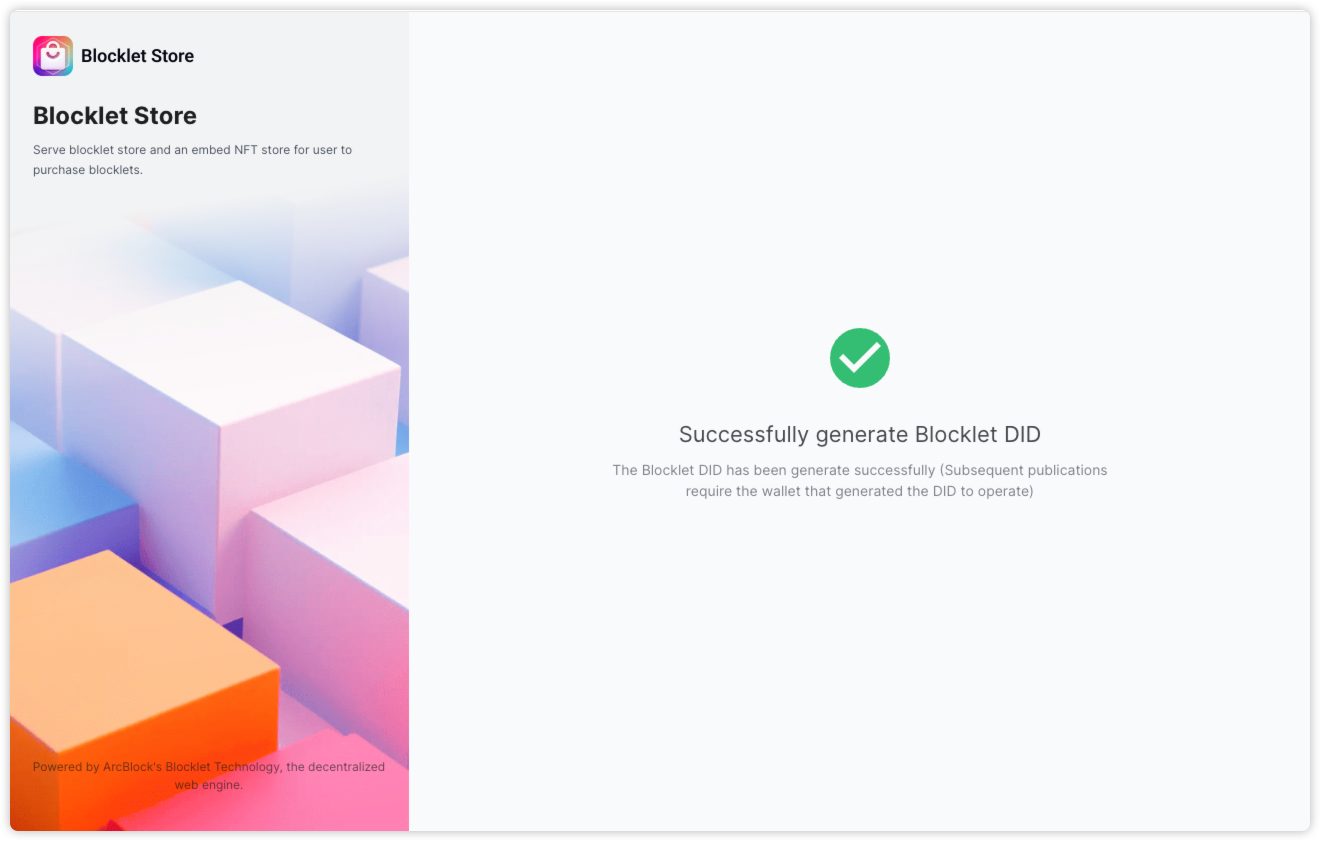
After the successful generation of the application DID, the terminal will output the following information.
cd todo-list
npm install
blocklet dev

Find more usage in README.md- Run the application
Now, we can enter the following command to launch the todo-list application in development mode.
cd todo-list
npm install // pnpm install or yarn install
blocklet dev
Login to the app and select your DID Spaces as the storage medium:
Create your Todo in the app. Once created successfully, the data will be stored in DID Spaces:
- View data on DID Spaces
We can access the DID Spaces page by clicking on the avatar in the top right corner of the app -> clicking Profile -> clicking Settings -> clicking Storage.
On the DID Spaces page, click on the Todo List app, and then enter the specified folder to view the data stored in todo-list.json:
Extended Development#
When modifying your Todo on the front-end page, it will trigger the PUT API of the Todo List.
  // src/pages/todo-list.tsx
  const putTodoList = (todoArray: Todo[]) => {
    return axios.put('/api/todo-list', {
      todoList: todoArray,
    });
  };
Upon receiving a PUT request, the backend API utilizes @did-space/client capabilities to write data to DID Spaces.
  // api/src/routes/todo-list/$put.ts
  const output = await spaceClient.send(
    new PutObjectCommand({
      key: 'todo-list.json',
      data: JSON.stringify(req.body.todoList),
    }),
  );
At this stage, you should be able to develop an application tailored to your specific business requirements based on this minimalist example.
For more information on developing with DID Spaces, please refer to our development guide and API documentation.
Publish Blocklet to Test Blocklet Store#
You can complete the application's build and deployment publishing according to the following steps:
- Bump version:
npm run bump-version - Bundle:
npm run bundle - Upload blocklet to Test Store:
blocklet upload
Or you can directly use npm run upload to skip bundle and blocklet upload (Step2-3)
- Publish on store
Project Ideas#
Here are some interesting and useful application ideas for your reference, but of course you can completely follow your ideas:
- Verifiable Email Signatures: Develop a web app where users can customize email signatures with a simple form and generate/persist/verify verifiable credentials in DID Spaces, then attach a public link to the email signature, the link will give a verifiable page of the signature
- Personal Identity Blocklet: Create a personal identity blocklet similar to https://about.me, where users can build a personal landing page that aggregates links to their digital presence, powered by decentralized identity (DID).
- Decentralized User Profiles: Create a web app that allows users to design and generate personalized profile pages, which can be a alternative of https://linktr.ee
- Private Content Sharing Platform: Develop a web app where users can create private, encrypted spaces to share content securely, utilizing DID Spaces as the base storage.
References#
Any issues encountered during this process, any suggestions generated, can be discussed in our community forum.